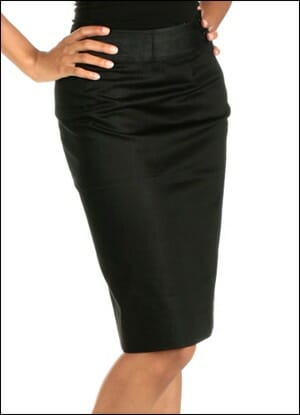
If you want a pencil skirt in color and fabric you want and you do not find here: http://so-sew-easy.com/making-a-pencil-skirt-sloper/ there are detailed instructions to make the pattern of a pencil skirt according to your measurements as and instructions to sew its. If you can not sew to go with the pattern on a dressmaker to sew that!!!!!
Θέλοντας να μεταδώσω τις χειροτεχνικές μου γνώσεις δημιούργησα αυτή την ιστοσελίδα με σκοπό να δημοσιεύω μια ανακοίνωση κάθε μέρα ώστε να γίνουν 365 όσες & οι μέρες του χρόνου. Wanting to spread the knowledge of my craft I created this site to put up a post every day to make 365 those are the days of the year
Κυριακή 30 Ιουνίου 2013
ΠΑΤΡΟΝ ΓΙΑ ΜΙΑ ΙΣΙΑ ΦΟΥΣΤΑ (PATRON FOR A PENCIL SKIRT)
If you want a pencil skirt in color and fabric you want and you do not find here: http://so-sew-easy.com/making-a-pencil-skirt-sloper/ there are detailed instructions to make the pattern of a pencil skirt according to your measurements as and instructions to sew its. If you can not sew to go with the pattern on a dressmaker to sew that!!!!!
Σάββατο 29 Ιουνίου 2013
ΑΝΑΚΑΙΝΙΙΣΗ ΓΛΑΣΤΡΩΝ ΓΙΑ ΤΟ ΕΞΟΧΙΚΟ ΣΠΙΤΙ (RENOVATION POTS FOR THE COUNTRY HOUSE)
Μερικές μικρές παλιές γλάστρες τις ανακαίνισα για έχουν μια θέση στο πεζούλι ενός εξοχικού σπιτιού!
Πάνω στο κεραμιδί χρώμα της βάσης πέρασα ένα στρώμα κρακελέ ενός συστατικού, κατόπιν φωτεινό κίτρινο ακρυλικό χρώμα με μικρό πινέλο για να δημιουργηθούν μικρές ρωγμές. Ύστερα έκανα decoupage με εικόνες σκισμένες από χαρτοπετσέτα που είχαν τον ίδιο έντονο κίτρινο φόντο. Τέλος ένα στρώμα λούστρου με πινέλο για προστασία. Τα έντονα σκασίματα & το φωτεινό χρώμα έδωσαν την εντύπωση του ρουστίκ & του φθαρμένου!
Επειδή οι γλάστρες ήταν μικρές φύτεψα γεράνια που έχουν μικρό ριζικό σύστημα.
Some small old pots renovations to have a place on the low wall of a country house!
On the brick base color layer krakele spent a single component, then bright yellow acrylic paint with a small brush to create small cracks. After doing decoupage with pictures torn from paper towel had the same bright yellow background. Finally a layer of lacquer with a brush for protection. The intense cracks & bright color gave the impression of rustic & the worn!
Because small pots were planted geraniums having small roots.
Παρασκευή 28 Ιουνίου 2013
ΜΕΤΑΤΡΟΠΗ ΦΩΤΟΓΡΑΦΙΩΝ ΓΙΑ ΧΡΗΣΗ ΣΕ ΜΙΚΡΑ ALBUM (PHOTO CONVERTERS FOR USE IN SMALL ALBUMS)
It's a nice and easy idea to give away to your friends their memories of an event or a travel.
Πέμπτη 27 Ιουνίου 2013
ΣΚΕΥΟΣ ΣΕΡΒΙΡΙΣΜΑΤΟΣ ΑΠΟ ΚΟΥΤΙΑ ΚΟΝΣΕΡΒΩΝ (TURN SERVING FROM CANS)
Αυτό το σκεύος σερβιρίσματος για ξηρούς καρπούς που συνοδεύουν τα ποτά το έκανα από τρεις κονσέρβες τόνου!!!!!!!!
This serving dish for nuts that accompany the drinks did three canned tuna!!!
- Πρώτα κόλλησα τα τρία τενεκεδάκια & κόλλησα στο κέντρο τους ένα καπάκι από βαφή νυχιών για καπάκι.
- Πρόσθεσα στα χείλη των κουτιών & στο κέντρο πάστα διαμόρφωσης.
- Μετά τα ψέκασα με ακρυλικό μπεζ χρώμα.
- Έκανα τριγύρω στα κουτιά decoupage μικρές εικόνες από άνθη & συμπλήρωσα το υπόλοιπο με ακρυλικά χρώματα.
- Τέλος τοποθέτησα στη βάση του χερουλιού τρία άνθη από πολυμερικό πηλό.
This serving dish for nuts that accompany the drinks did three canned tuna!!!
- First I stuck three cans & stuck on the center cap from a paint polish lid.
- Added to the lips of the boxes in the center & paste formulation.
- After spraying with acrylic beige color.
- I did around the boxes decoupage small images of flowers and fill in the rest with acrylic colors.
- Finally I placed the base of the handle three flowers from polymer clay.
Τετάρτη 26 Ιουνίου 2013
Τρίτη 25 Ιουνίου 2013
ΑΠΛΗ ΔΙΑΚΟΣΜΗΣΗ ΓΛΑΣΤΡΩΝ (MINIMAL DESIGN OF POTS)
Αφού τις καθαρίσετε καλά περνάτε ένα στρώμα από αστάρι για ακρυλικά χρώμα τα & μετά τις ψεκάζετε με δυο -τρία ακρυλικά spray. Τέλος καλύψτε τις γλάστρες με μερικά στρώματα λούστρου για προστασία. Ψεκάστε όλες τις γλάστρες μαζί για να μην έχετε διαφοροποίηση στα χρώματα. Είναι ιδανικές για μίνιμαλ χώρους & φυτά εσωτερικού χώρου.
After you clean them well spend a layer of primer to the acrylic paint and after spraying with two-three acrylic spray. Finally cover the pots with a few layers of lacquer for protection. Sprinkle all the pots together to not have variation in colors. It is ideal for minimalist spaces & houseplants.
Δευτέρα 24 Ιουνίου 2013
ΑΛΜΠΟΥΜ ΦΩΤΟΓΡΑΦΙΩΝ ΑΠΟ ΤΗ ΣΗΜΕΡΙΝΗ ΓΙΟΡΤΗ (ALBUM OF THE TODAY CELEBRATION0
Today great celebration of Christianity's of Holy Spirit, I made this little photo album, watching this video https://www.youtube.com/watch?v=ZWegOxSHvvM to include my photos from my visit in today's celebration of the monastery of the Holy Trinity in Meteora. The album placing two images related to the current celebration after burned their margins.
Κυριακή 23 Ιουνίου 2013
ΓΛΑΣΤΡΕΣ ΜΕ ΗΛΙΑΝΘΟΥΣ (POTS WITH SUNFLOWERS)
Λευκές γλάστρες που έχουν τη δυνατότητα να στερεώνονται στα κάγκελα μόνες τους τις διακόσμησα με decoupage με εικόνες ηλίανθων σκισμένες από χαρτοπετσέτα. Μετά το decoupage έγιναν μικρές διορθώσεις με ακρυλικά χρώματα & αρκετά στρώματα λούστρου για αντοχή & προστασία. Για φύτευση προτίμησα φυτά με πολύ πράσινο φύλλωμα , όχι ανθοφόρα για να δημιουργούν αντίθεση με το έντονο χρώμα των εικόνων.
Σάββατο 22 Ιουνίου 2013
ΤA ΠΙΟ ΕΥΚΟΛΑ CUPCAKES (THE MOST EASILY CUPCAKES)
Εδώ είναι η συνταγή για τα πιο εύκολα cupcakes:
ΥΛΙΚΑ
1 κουταλάκι μπέκιν πάουντερ
1/4 κουταλάκι αλάτι
1/4 φλιτζάνι μαλακό βούτυρο
1 φλιτζ. ζάχαρη
1/3 φλιτζ. γάλα
1 μεγάλο η 2 μικρά αυγά
ξύσμα λεμονιού ή βανίλια για άρωμα
ΕΚΤΕΛΕΣΗ
Χτύπημα των υλικών όπως σε όλα τα cake, μοίρασμα σε βουτυρωμένες μικρές φόρμες, ψήσιμο σε προθερμασμένο φούρνο για είκοσι λεπτά (20'). Μετά το ψήσιμο αν θέλουμε τα διακοσμούμε με γλάσο. Γίνονται ακριβώς δώδεκα cupocakes!!!!!!!!!
Here is the recipe for the easiest cupcakes:
MATERIALS
1 cup. flour, all-purpose
1 teaspoon baking powder
1/4 teaspoon salt
1 cup. sugar
1/3 cup. milk
1 large or 2 small eggs
lemon zest or vanilla flavor
EXECUTION
Hitting materials like all cake, sharing in small buttered molds and baking it in a preheated oven for twenty minutes (20 '). After firing if we decorate them with icing. Are exactly twelve cupocakes!!!!!!!!!
Παρασκευή 21 Ιουνίου 2013
DECOUPAGE ΜΕ ΧΑΡΤΟΠΕΤΣΕΤΑ ΣΕ ΣΚΟΥΡΑ ΜΠΟΥΚΑΛΙΑ (DECOUPAGE IN DARK BOTTLES WITH NAPKIN)
Σ' αυτά τα δυο σκούρα μπουκάλια έγινε decoupage με χαρτοπετσέτα με τον ακόλουθο τρόπο ώστε να μην αλλοιωθεί η ελεύθερη επιφάνεια του μπουκαλιού από την εργασία του decoupage & να είναι ευκρινείς οι εικόνες.
In these two dark bottles made by napkin decoupage with the following manner, so as not to distort the free surface of the bottle from his decoupage & have crisper images.
- Πρώτα ψαλιδίζουμε τις εικόνες απ΄τη χαρτοπετσέτα κρατώντας & τα τρία φύλλα του χαρτιού.
- Τοποθετώντας κατόπιν το ένα φύλλο στο σημείο που θα γίνει η επικόλληση χαράζουμε με λεπτό μαρκαδόρο το περίγραμμά του.
- Γεμίζουμε αυτό το σχήμα με primer με τη χρήση σφουγγαριού για να αδιαφανωποιηθεί το σημείο που θα γίνει το decoupage.
- Ακολουθεί το decoupage.
- Προτού στεγνώσει η κόλλα με οινόπνευμα χρησιμοποιώντας βατονέττα καθαρίζουμε τις επιφάνειες γύρω απ' τις εικόνες .
- Προαιρετικά περνάμε ένα στρώμα κόλλας decoupage με glitter για λάμψη.
- Αν επιθυμούμε τονίζουμε τις εικόνες με conture(relief), μαρκαδόρους ή pearl pen.
In these two dark bottles made by napkin decoupage with the following manner, so as not to distort the free surface of the bottle from his decoupage & have crisper images.
- First snip images from napkin holding & three sheets of paper.
- Putting on a sheet where it will be pasted, engrave the outline with thin marker .
- Fill this shape with primer using sponges so as the point where the decoupage happens, remains transparent.
- The decoupage is following.
- Before the epoxy alcohol using vatonetta clean surfaces around from the pictures.
- Optionally apply one layer decoupage glue with glitter for sparkle.
- If you like, emphasize the images with conture (relief), markers or pearl pen.
Πέμπτη 20 Ιουνίου 2013
ΚΑΣΠΩ ΜΕ ΠΕΤΑΛΟΥΔΕΣ & ΑΝΘΗ ΓΙΑ ΒΑΣΙΛΙΚΟ (POTS WITH BUTTERFLIES AND FLOWERS FOR BAZIL)
Μάνα μ' σγουρός βασιλικός
πλατύφυλλος και δροσερός,
Μάνα μου ποιος τον πότιζε
και τον εκορφολόγιζε;
Και 'κάνε κλώνους και κλωνιά
κι εσκέπασε μια γειτονιά.
Κι εσκέπασε κι εμένανε
που μ' έχει η μάνα μ' ένανε.
Αυτό το δημοτικό τραγούδι από το αναγνωστικό της Α' Δημοτικού θυμήθηκα όταν άλλαξα την όψη αυτό του τετραπλού κασπώ για να τοποθετήσω γλαστράκια με βασιλικό& να το βάλω στο μπαλκόνι μου για να διώχνει τα κουνούπια!!!!!!!!!!!!!!
Ψέκασα το κίτρινο κασpώ με ακρυλικό spray κρακελέ & κατόπιν έκανα decoupage με εικόνες από χαρτοπετσέτα.
broadleaved and cool
Mother who watered
and who pruned?
It did clones and strandeness
and it covered a neighbourhood.
And it overlaid me which
I' m my mother's the only son .
This folk song from the reading of the First Primary remembered when I changed the look of this quad pot to place pots with basil & to put it on my balcony for warding off mosquitoes!!!!!!!!!!!!
I spray the yellow frame with acrylic spray krakele & then I decoupage with pictures of paper towel.
Τετάρτη 19 Ιουνίου 2013
ΘΗΚΗ ΑΠΟΘΗΚΕΥΣΗΣ ΑΠΟ ΚΟΥΤΙ ΠΑΠΟΥΤΣΙΩΝ (CASE STORAGE OF CARTON TEXT OF SHOES)
I transformed a box of shoes into a pocket lingerie or scarves covered with fabric. At the finish of the two front sides sewed a lace. I created back a noose, so it can be hang inside the door of a closet in order to save space. Click and here: http://www.youtube.com/watch?v=YIV2mtGDaw4 , you will be inspired to create.
Τρίτη 18 Ιουνίου 2013
ΓΛΑΣΤΡΕΣ ΜΕ ΕΙΚΟΝΕΣ ΜΑΝΙΤΑΡΙΩΝ ( POTS WITH IMAGES OF MUSHROOMS)
Τρεις γλάστρες διακοσμημένες με εικόνες μανιταριών σκισμένες από χαρτοπετσέτα όπως διακοσμήθηκαν οι γλάστρες που περιγράφονται εδώ: http://lila365idees.blogspot.gr/2013/06/pots-with-images-of-fruits.html .
Three pots decorated with images of mushroom ripped with paper napkin, the same way decorated as described here:
http://lila365idees.blogspot.gr/2013/06/pots-with-images-of-fruits.html .
Δευτέρα 17 Ιουνίου 2013
ΓΛΑΣΤΡΑ ΚΡΑΚΕΛΕ ΜΕ ΦΡΑΟΥΛΕΣ (POT IN KRAKELE WITH STRAWBERRIES)
Οι διαδοχικές εργασίες ήταν οι εξής:
- Σκούρο πλαστικό χρώμα μέσα έξω.
- Κρακελέ ενός συστατικού, στην εξωτερική πλευρά.
- Ανοιχτόχρωμο πλαστικό χρώμα με πλακέ μικρό πινέλο. (Η διαφορετική κατεύθυνση του πινέλου στις διάφορες ζώνες δίνει την διαφορετική κατεύθυνση στις ρωγμές).
- Decoupage με εικόνες σκισμένες από χαρτοπετσέτα. (Το φόντο της γλάστρας πρέπει να είναι το ίδιο με το φόντο της χαρτοπετσέτας για να μην φαίνονται οι ενώσεις).
Decorate a simple pot with pictures of strawberries to plant strawberries.
Successive operations were:
- Dark color plastic inside out.
- Krakele of a component, on the outer side.
- Light plastic color with small flat brush. (The different direction of the brush in the various zones gives different direction into the cracks).
- Decoupage with images of torn paper towel. (The background of the pot must be the same as the background of the napkin to prevent associations appear).
- Two or three layers of lacquer with a brush for protection.
- Δυο-τρία στρώματα λούστρου με πινέλο για προστασία.
Κυριακή 16 Ιουνίου 2013
ΜΙΑ ΠΙΤΑ ΑΛΛΟΙΩΤΙΚΗ (A DIIFFERENT PIE)
Βλέποντας αυτό το βίντεο: http://www.youtube.com/watch?feature=player_embedded&v=XgRjszte3u0 σκέφτηκα να κάνω αντί για τη μηλόπιτα που παρουσιάζει μια πίτα με κιμά στο κέντρο & χτυπημένα αυγά με τριμμένο τυρί στα περιθώρια. Έφτιαξα μια δόση σάλτσας τομάτας με κιμά (όπως για μακαρόνια), την τοποθέτησα στο κέντρο & τριγύρω πασπάλισα τριμμένα διάφορα τυριά & σκέπασα με τα πάνω φύλλα. Χρησιμοποίησα φύλλο γιουφκά αλειμμένο με χτυπημένα αυγά & λίγο γιαούρτι. (Αυτό είχα πρόχειρο). Το αποτέλεσμα ήταν γευστικότατο αν & το ιδανικό θα ήταν φύλλο σφολιάτας που φουσκώνει αρκετά με το ψήσιμο καθώς & να πασπαλιστεί το κέντρο με σουσάμι ή μαυροκούκι ή οποιουδήποτε σπόρους πασπαλίζονται τα ψωμιά. Τότε δημιουργείται ένας πραγματικός ηλίανθος!!!!!!!!!!!!!!
Seeing this video: http://www.youtube.com/watch?feature=player_embedded&v=XgRjszte3u0 I thought instead of apple pie that presents a pie with meat in the center and beaten eggs with grated cheese on the margins. I made a dose tomato sauce with meat (as for pasta), placement in the center and around sprinkling grated cheeses & I covered up with leaves. I used sheet gioufka smeared with beaten eggs and a little yogurt. (That'd clipboard). The result was delicious though and it would be ideal pastry that inflates with enough baking as Will & sprinkle with sesame or any seeds sprinkled on breads. Then created a real sunflower!!!!!
Σάββατο 15 Ιουνίου 2013
ΜΕΤΑΜΟΡΦΩΣΗ ΓΥΑΛΙΝΟΥ ΒΑΖOΥ ΣΕ ΚΗΡΟΠΗΓΙΟ (TRANSFORMATION OF A GLASS VASE IN CANDLESTICK)
Βλέποντας αυτό το βίντεο https://www.youtube.com/watch?v=LH8GnA-aJ_M εμπνεύστηκα & μεταμόρφωσα ένα βάζο που είχε χαθεί το καπάκι του σε βάση για ρεσώ. Αρχίζοντας με frost (για να διατηρηθεί η διαφάνεια), συνεχίζοντας με decoupage με εικόνα από χαρτί decoupage & συμπληρώνοντας την εικόνα με ακρυλικά χρώματα & κατάλληλα πινέλα. Τέλος κορδέλες, σχοινιά & χάντρες δέθηκαν στο λαιμό του & τοποθετήθηκε ένα ρεσώ μέσα σ'αυτό.
Seeing this video https://www.youtube.com/watch?v=LH8GnA-aJ_M I was inspired and transfigured a jar that had lost its lid to base for tea lights. Beginning with frost (to preserve transparency), continuing with decoupage image of paper decoupage & filling the image with acrylic paints & brushes properly. Finally ribbons, beads & cords tied around his neck and placed a candle in it.
Παρασκευή 14 Ιουνίου 2013
ΓΛΑΣΤΡΕΣ ΜΕ ΕΙΚΟΝΕΣ ΦΡΟΥΤΩΝ (POTS WITH IMAGES OF FRUITS)
Απλές γλάστρες σε κεραμιδί χρώμα άλλαξαν όψη ως εξής:
- Πρώτα τις πέρασα μ ένα στρώμα αστάρι πλαστικού για να ενσωματωθούν τα υπόλοιπα στρώματα & να μην ξεφλουδίσουν με τη χρήση.
- Μετά ψέκασα με ένα spray ακρυλικό σε ανοιχτό κίτρινο χρώμα.
- Ακολούθησε decoupage με εικόνες καλοκαιρινών φρούτων σκισμένες από χαρτοπετσέτα. (Στο decoupage σε γλάστρες προτιμήστε εικόνες μεγάλες χωρίς πολλές λεπτομέρειες γιατί οι γλάστρες είναι ορατές από μακριά).
- Με τη βοήθεια σφουγγαριού ταμπονάρουμε τριγύρω από τα φρούτα στο χρώμα του φόντου για να ενσωματωθούν οι εικόνες στο φόντο.
- Τέλος δυο-τρία στρώματα λούστρου με πινέλο για να προφυλαχθούν οι γλάστρες απ΄τη φθορά.
Simple pots in terracotta color appearance changed as follows:
- I spent the First of with a layer of plastic primer to integrate the remaining layers & not peel off with use.
- After spraying a spray acrylic bright yellow color.
- Follow decoupage with pictures of summer fruits torn paper towel. (In decoupage potted prefer large images without many details because the pots are visible from afar).
- With the help of sponge dab around the fruit in the background color to incorporate images in the background.
- Finally two or three layers of lacquer with a brush to guard the pots remove you from damage.
Πέμπτη 13 Ιουνίου 2013
ΚΑΔΡΟ ΣΕ ΜΟΝΤΕΡΝΑ ΓΡΑΜΜΗ (FRAME IN MODERN LINE)
Μετά χρησιμοποιώντας σφουγγάρι & κατάλληλα ακρυλικά χρώματα συμπλήρωσα το φόντο καλύπτοντας τις άκρες της χαρτοπετσέτας. Επίσης με τα αντίστοιχα χρώματα κάλυψα και τα πλαϊνά του τελάρου. Χρησιμοποιώντας σπάτουλα ζωγραφικής & cristal gel κάλυψα το δέντρο , το χώμα & με μείγμα πράσινου & διάφανου gel την πρασινάδα & με μείγμα γαλάζιου & διάφανου τον ουρανό. Αυτή η επεξεργασία του έδωσε μια πρωτότυπη ανάγλυφη λάμψη. Τέλος με πράσινο pearl pen τόνισα τα φύλλα σβήνοντας τα με πινέλο & τα άνθη με κουκκίδες από λευκό pearlpen. Επίσης με καφέ & μπεζ pearl pen τον κορμό που το ομαλοποίησα με τη σπάτουλα. Το αποτέλεσμα είναι ένα ανάγλυφο, λαμπερό τελάρο
After using sponge and acrylic paints suitable complement the background covering the edges of the napkin. Also with matching color cover and the sides of the canvas. Using spatula painting & cristal gel I covered the tree, the soil and mix with green & transparent gel its greenery is and with a mixture of blue and transparent the sky. This treatment gave him an original embossed shine. Finally with green pearl pen stressed leaves erasing brush & flowers with white dots pearlpen. Also in brown and beige pearl pen the trunk that normalization with the spatula. The result is a textured, shiny frame ..
Τετάρτη 12 Ιουνίου 2013
ΔΙΑΚΟΣΜΗΣΗ ΓΥΑΛΙΟΥ ΜΕ FROST & STENCIL (DECORATIVE IN GLASS WITH FROST & STENCIL)
- Πρώτα με χαρτοταινία απομονώθηκε το πάνω μέρος.
- Μετά το κάτω μέρος καλύφθηκε με ελαφρό στρώμα frost με τη βοήθεια σφουγγαριού. Μ' αυτό τον τρόπο η επιφάνεια αποκτά όψη οπαλίνας.
- Αφού αφαιρεθεί η χαρτοταινία τοποθετούμε ένα stencil ταμπονάρουμε με ένα frost άλλου χρώματος.
- Κατόπιν τα χρωματισμένα σημεία τα περιβάλλουμε με conture(relief) ομοίου χρώματος. Τέλος στο σημείο που χωρίζεται το διάφανο & το αδιαφανές μέρος κάνουμε μια σειρά με κουκκίδες από pearl pen.
A bottle and a glass of old dinnerware (to be used as base for tea lights) transformed as follows:
- First with masking tape isolated top.
- After the bottom was covered with light frost layer using a sponge. In this way, the surface acquires opal appearance.
- After removing the masking tape put a dab stencil with a frost of another color.
- Then the colored dots surround them with conture (relief) of identical color. End point separated the transparent and the opaque part of making a series of dotted of pearl pen.
Τρίτη 11 Ιουνίου 2013
Δευτέρα 10 Ιουνίου 2013
ΖΩΝΗ ΜΕ ΚΟΡΔΟΝΙ & ΠΟΛΥΜΕΡΙΚΟ ΠΗΛΟ (ZONE WITH CORD & POLYMER CLAY)
Αυτή τη ζώνη την έχω κατασκευάσει εδώ και εικοσιπέντε χρόνια!!!!!!!!!!!!!!!
Με μείγμα καφέ & μαύρου cernit είχα κάνει το κεντρικό λουλούδι & στο πίσω μέρος του είχε προσαρμοστεί ένα κρίκο . Επίσης οκτώ πλακέ κρίκους από το ίδιο υλικό & χρώμα. Στο κέντρο του λουλουδιού είχα τοποθετήσει μερικές μικρές χάντρες χρυσού χρώματος. Μετά το ψήσιμο & το πέρασμα ενός στρώματος κατάλληλου λούστρου για πολυμερικό πηλό πέρασα μέσα από τον κρίκο του λουλουδιού δύο χοντρά κορδόνια. Κατόπιν πέρασα δεξιά & αριστερά δύο χοντρούς μεταλλικούς κρίκους καθώς & τους κρίκους από cernit έχοντας ανάμεσά τους μεταλλικές ροδέλες που είχα αγοράσει από κατάστημα οικοδομικών ειδών! Ύστερα έκανα διαδοχικούς κόμπους τύπου μακραμέ & αφού το κορδόνι είχε αποκτήσει το επιθυμητό μήκος έβαλα το κατάλληλο κούμπωμα. Η ζώνη φοριέται με δυο βόλτες γύρω από τη μέση.
This zone I've constructed here and twenty years!!!!!
With a mixture of brown & black cernit had made the central flower and the back had a adapted link. Also flat eight rings of the same material and color. In the center of the flower I had put a few small beads gold. After baking and passing a suitable layer of lacquer for polymer clay passed through the eye of the flower two thick laces. Then I went right & left two thick metal rings and their rings of cernit having among them metal washers I bought from store of building types! After I type consecutive the kord in knots in Macrame cord after it had acquired the desired length I put the appropriate clasp. This zone is worn with two walks around the waist.
Με μείγμα καφέ & μαύρου cernit είχα κάνει το κεντρικό λουλούδι & στο πίσω μέρος του είχε προσαρμοστεί ένα κρίκο . Επίσης οκτώ πλακέ κρίκους από το ίδιο υλικό & χρώμα. Στο κέντρο του λουλουδιού είχα τοποθετήσει μερικές μικρές χάντρες χρυσού χρώματος. Μετά το ψήσιμο & το πέρασμα ενός στρώματος κατάλληλου λούστρου για πολυμερικό πηλό πέρασα μέσα από τον κρίκο του λουλουδιού δύο χοντρά κορδόνια. Κατόπιν πέρασα δεξιά & αριστερά δύο χοντρούς μεταλλικούς κρίκους καθώς & τους κρίκους από cernit έχοντας ανάμεσά τους μεταλλικές ροδέλες που είχα αγοράσει από κατάστημα οικοδομικών ειδών! Ύστερα έκανα διαδοχικούς κόμπους τύπου μακραμέ & αφού το κορδόνι είχε αποκτήσει το επιθυμητό μήκος έβαλα το κατάλληλο κούμπωμα. Η ζώνη φοριέται με δυο βόλτες γύρω από τη μέση.
This zone I've constructed here and twenty years!!!!!
Εγγραφή σε:
Αναρτήσεις (Atom)